Home Assistant Add-on
The HLE add-on runs directly inside Home Assistant as a managed service. No separate server, no Docker compose, no SSH. Install it from the HA App Store, enter your API key, and your Home Assistant is accessible from anywhere with built-in SSO.
Prerequisites
- Home Assistant OS or Supervised — Add-ons require HAOS or Supervised install. Docker/Core installs are not supported.
- HLE API Key — Get yours at hle.world/dashboard/keys after creating a free account.
- Internet access — The add-on connects outbound to the HLE relay. No inbound ports or port forwarding needed.
- ~5 minutes — From zero to a live public URL for your Home Assistant.
Quick Install
Click the button below to add the HLE repository to your Home Assistant instance automatically:

This opens your Home Assistant and pre-fills the repository URL. After adding it, search for HomeLab Everywhere in the App Store and install. Then skip to Step 4 below.
Manual Installation
Step 1: Open Settings
In your Home Assistant sidebar, click Settings. On the Settings page, click Apps.

Step 2: Open the App Store
The Apps page shows your currently installed add-ons. Click the Install app button in the bottom-right corner to open the App Store.
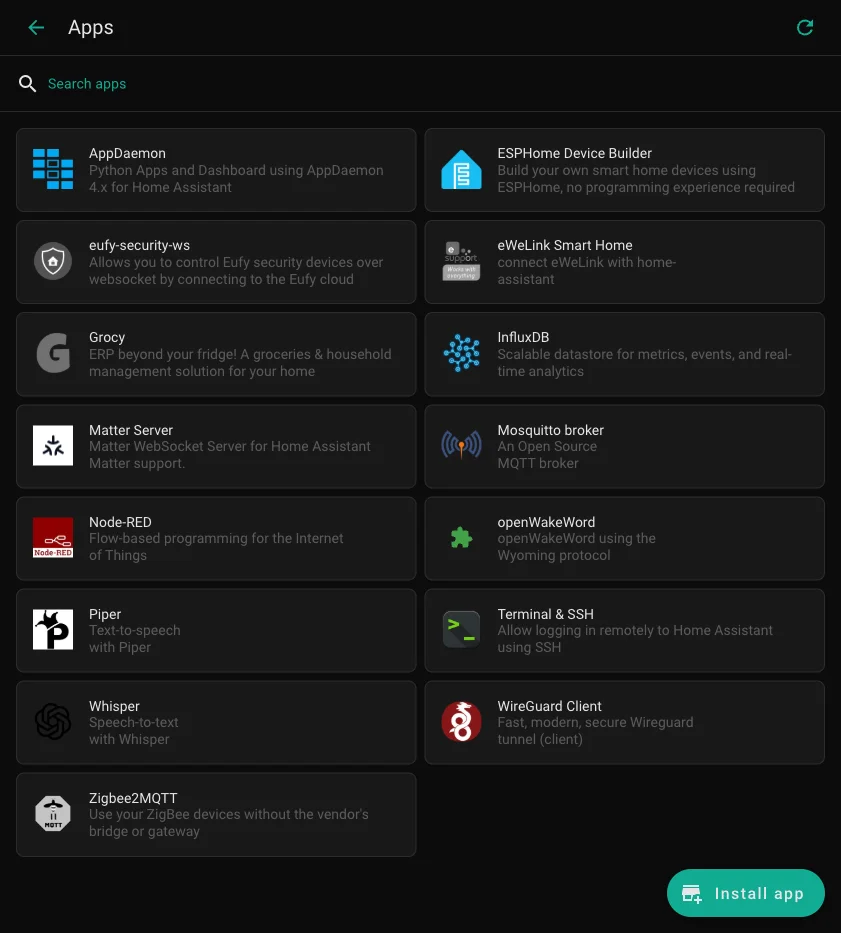
Step 3: Add the HLE repository
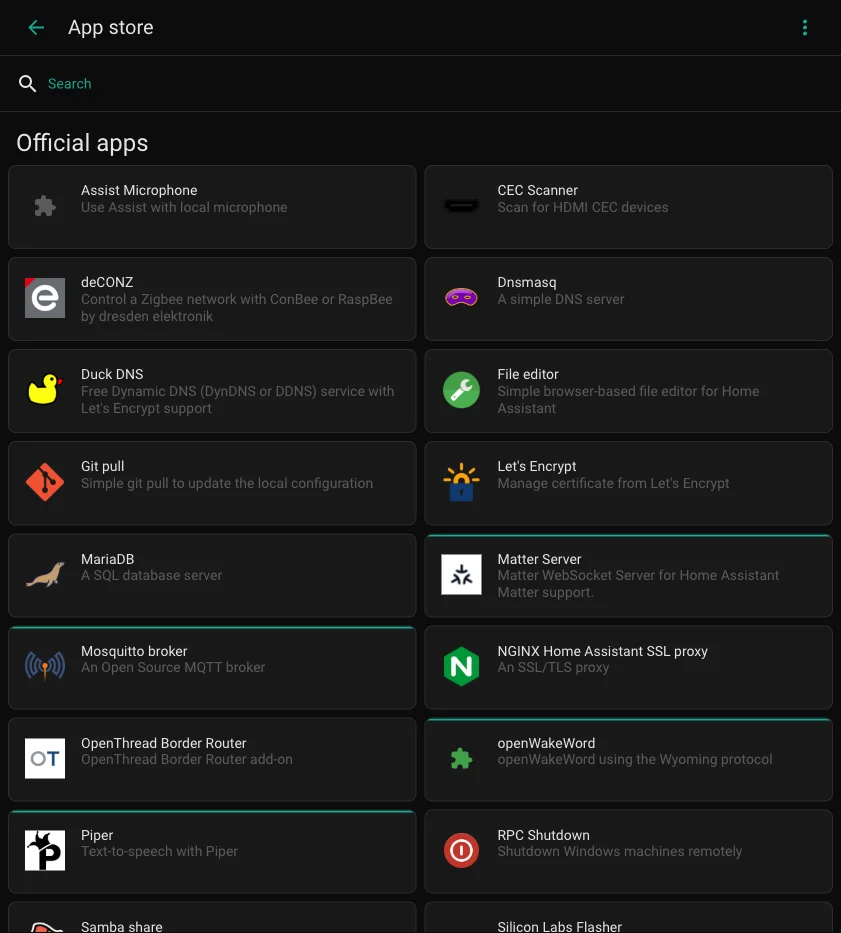
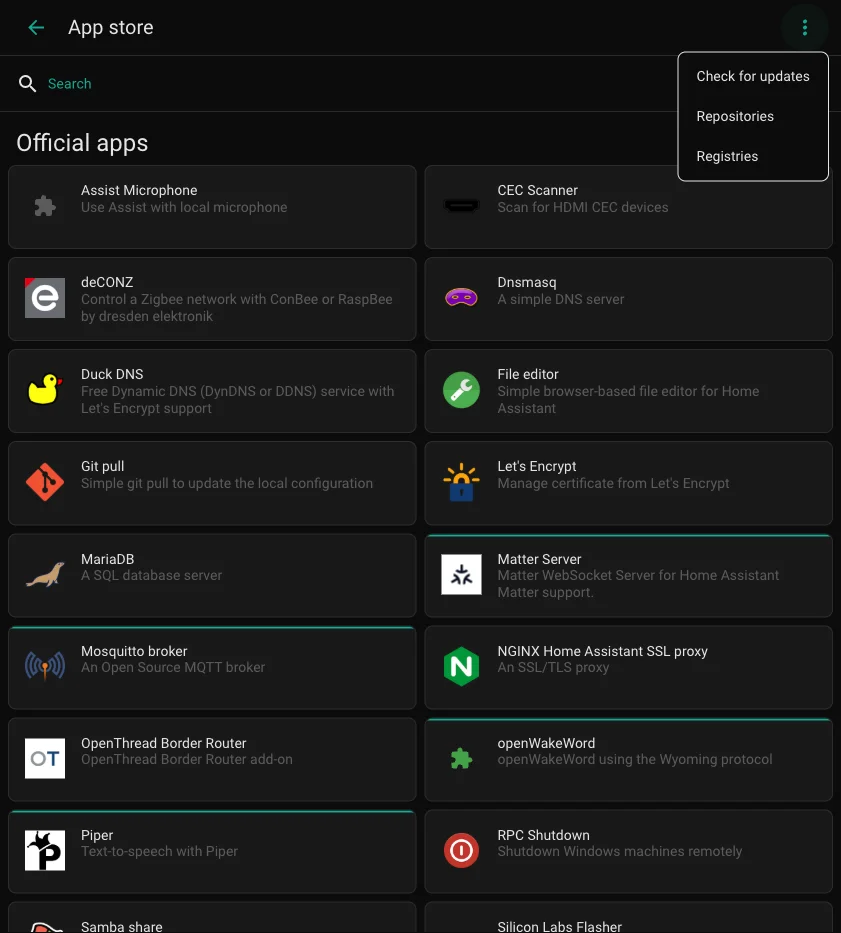
The HLE add-on is not in the official store — you need to add the repository first. In the App Store, click the three-dot menu in the top-right corner.
Click Repositories from the menu.
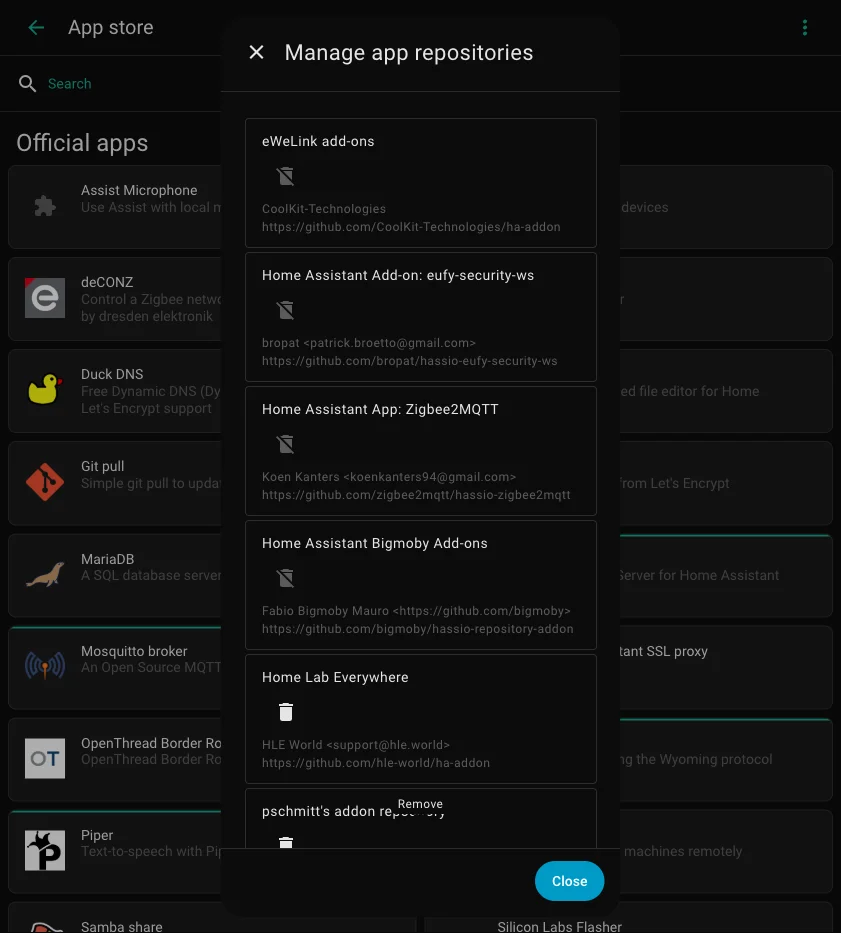
In the Manage app repositories dialog, paste the HLE repository URL into the Add field and click Add, then Close.
https://github.com/hle-world/ha-addon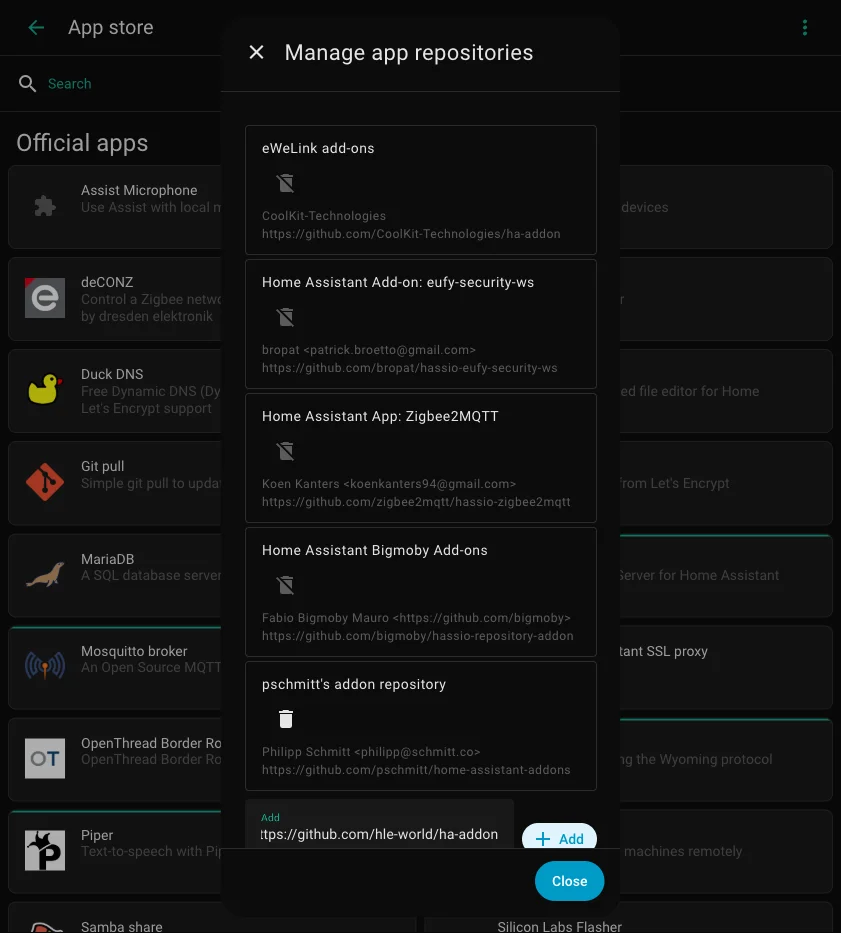
After clicking Add, the HomeLab Everywhere repository will appear in the list. Click Close.
Step 4: Find and install the add-on
After closing the repositories dialog, search for hle in the App Store search bar. The HomeLab Everywhere add-on will appear under its own repository section.
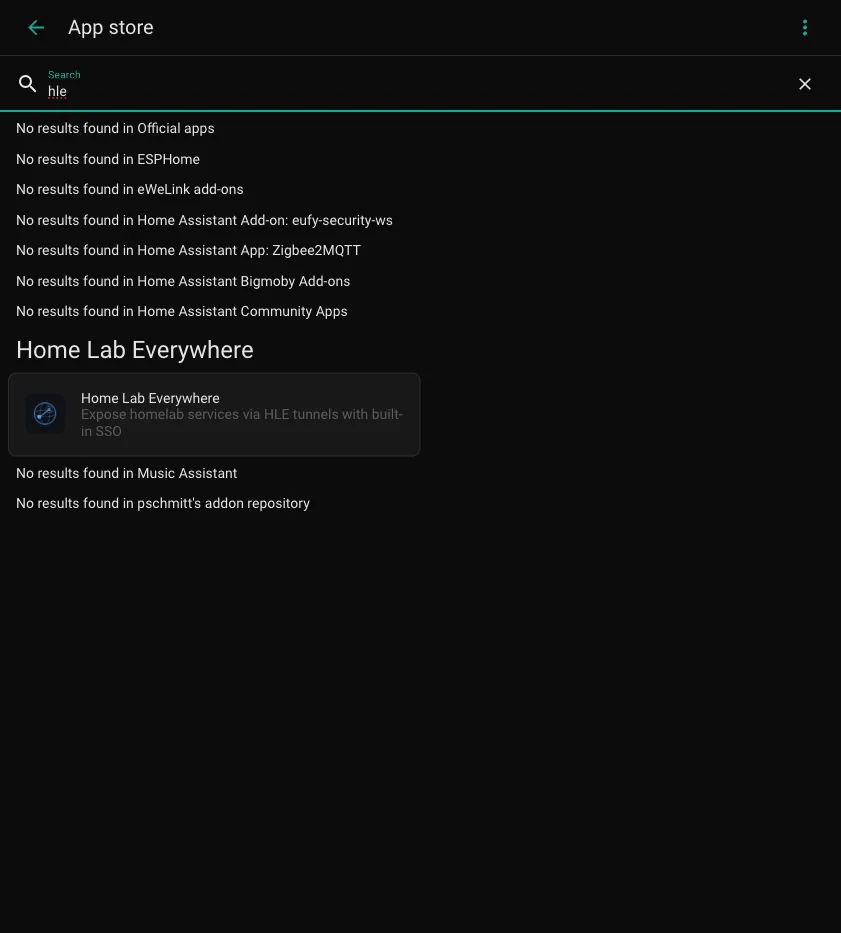
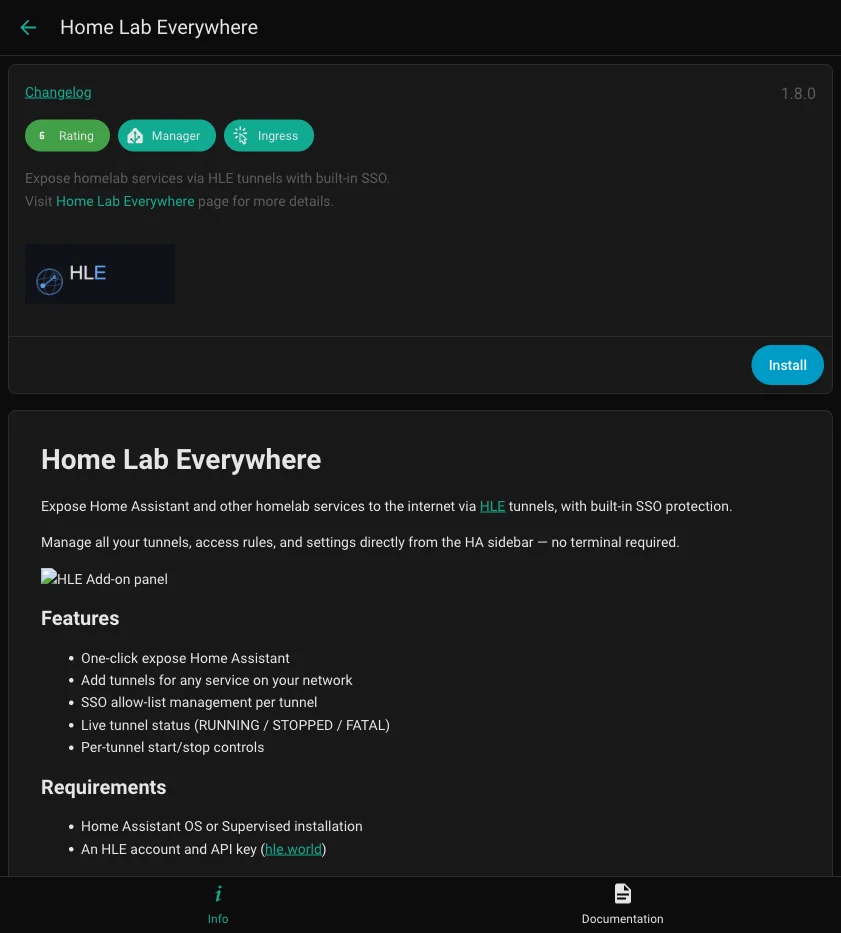
Click HomeLab Everywhere to open the add-on info page, then click Install.
Step 5: Start the add-on
Once installed, you’ll see the add-on configuration page. The recommended settings are:
- Start on boot — on (so tunnels restart after HA reboots)
- Watchdog — on (auto-restart if the add-on crashes)
- Auto update — your preference
- Show in sidebar — on (recommended, for easy access)
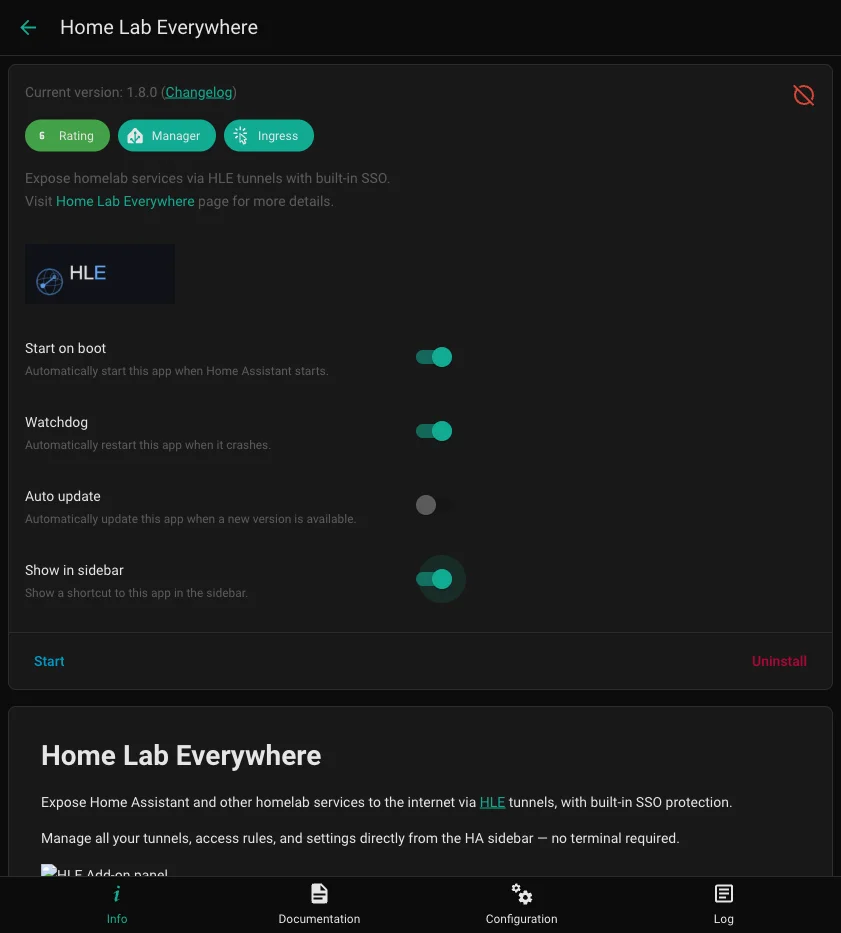
Scroll down and click Start. The add-on will start within a few seconds.
Step 6: Configure your API key
Once started, open the HLE panel from the sidebar (or click Open Web UI on the add-on page). The Settings section will be expanded automatically since no API key is set yet.
Paste your API key from hle.world/dashboard/keys and click Save. Your configured tunnels will start automatically.
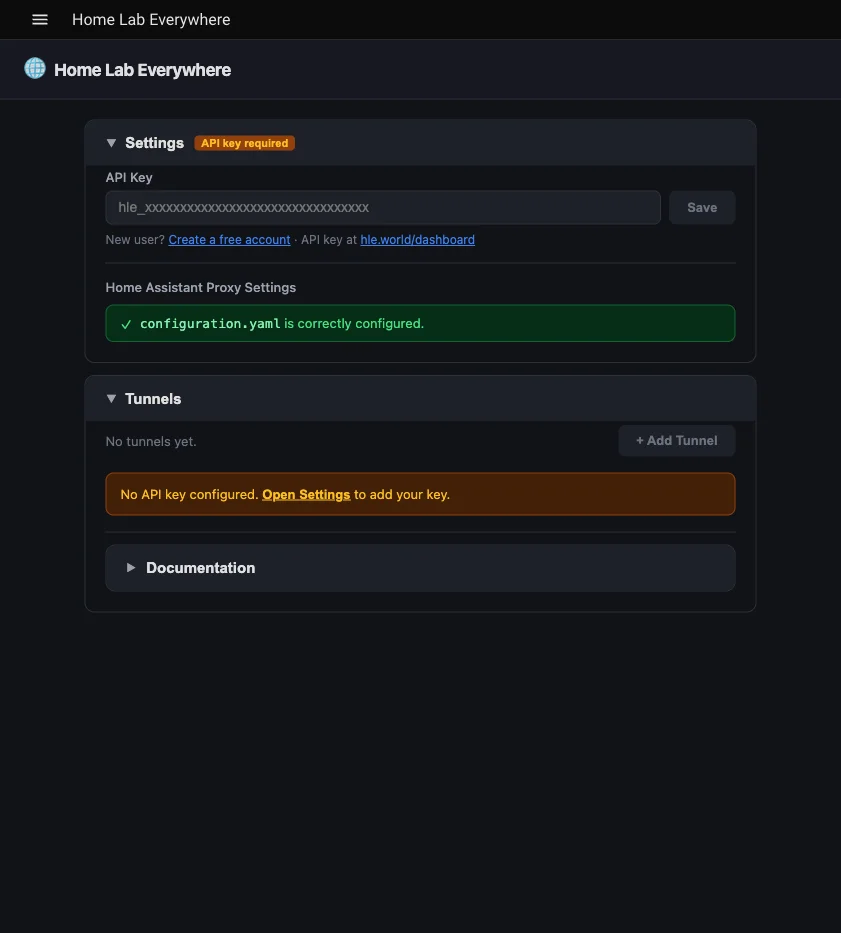
Step 7: Check proxy settings
To expose Home Assistant itself (not just other services), HA needs to trust the HLE add-on as a reverse proxy. Without this, HA returns 400 Bad Request on tunneled connections.
In the Settings section of the HLE panel, find Home Assistant Proxy Settings. The add-on auto-detects the correct subnet for your installation. If it shows configuration.yaml is correctly configured, you’re all set.
If the proxy settings are not configured yet, click Apply to configuration.yaml — the add-on writes the required http: block automatically.
Step 8: Add your first tunnel
In the Tunnels section, click + Add Tunnel. A dialog will appear with form fields for Service URL, Name, and Label.
Use the Quick-fill: Expose Home Assistant button to pre-fill the correct settings — it auto-detects your HA address, sets the name and subdomain label for you.
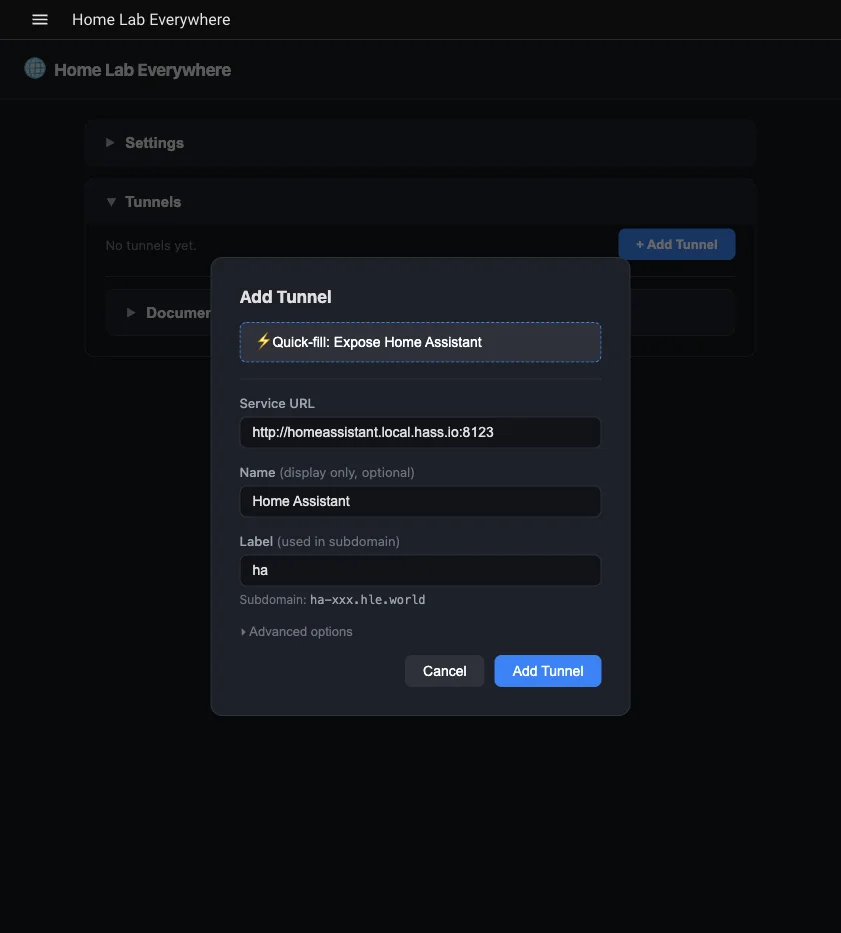
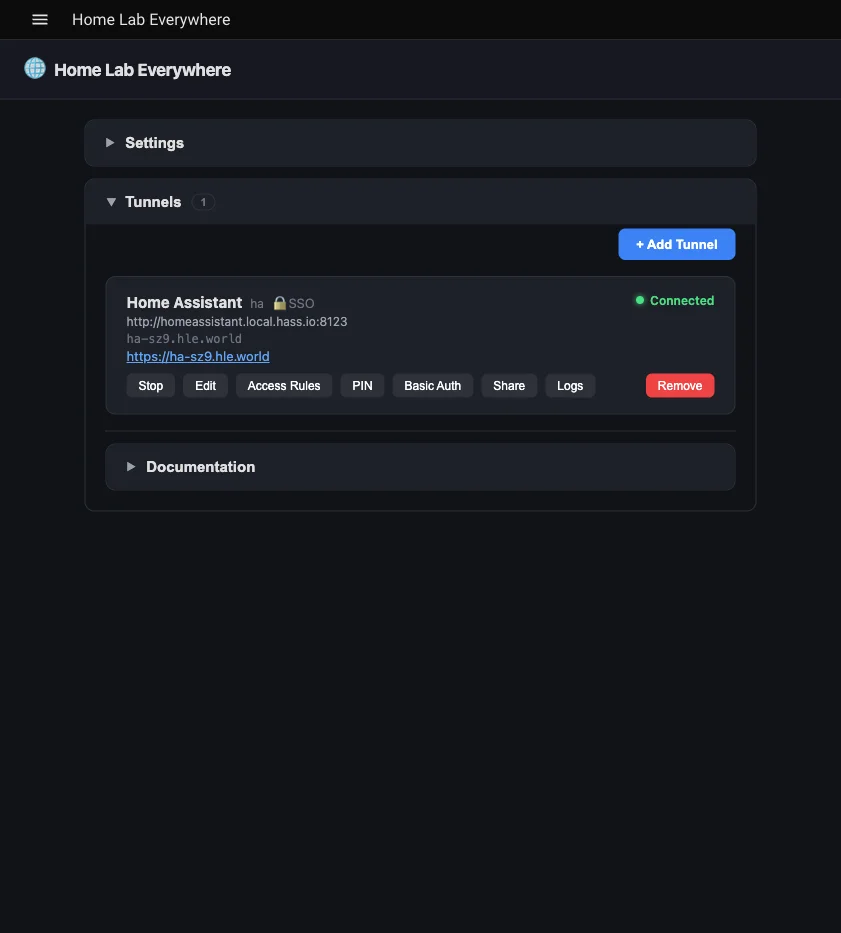
Click Add Tunnel. Within a few seconds the tunnel will show as Connected with a public URL like ha-xxx.hle.world. Click the URL to open your Home Assistant from anywhere.
Troubleshooting
400 Bad Request from Home Assistant
This means configuration.yaml has proxy settings but the add-on’s subnet is not listed in trusted_proxies, or the configuration hasn’t been loaded yet (HA restart required). Open the HLE panel > Settings > Home Assistant Proxy Settings — the add-on will detect and fix this automatically.
Tunnel stuck on CONNECTING
Check that your API key is correct in Settings. Click the Logs button on the tunnel card for details. A common cause is an invalid or expired API key.
Add-on doesn’t appear after adding the repository
Try clicking the refresh button in the top-right of the App Store, or close and reopen the App Store. If it still doesn’t appear, verify the repository URL is exactly https://github.com/hle-world/ha-addon.